DYI: Notifications from SGPro to an electricimp device
This is a quick way to send notifications from SGPpro to a device. Depending on the type of message the SGpro sends to the device, the device will light up a certain color LED. I am using an electricimp, if you are nor familiar with this particular device start here. SGP sends emails with the following titles:
- SGPro Error
- SGPro Warning
- Test Message from SGPro
- SGPpro….Completed
The messages will be from SGPro through a mailgun account and routed to the electricimp. The imp will parse the message subject and accordingly will display:
- Green – All good
- Red – Error
- Yellow – Warning
- Blue – Test
- All – Unknown message
First you need to setup a free mailgun account. Follow the steps in this post. After completing this step you need to set up a route. Effectively, mailgun receives your message then sends an HTTP Post with details to your imp. There are four parts:
- Hardware Setup
- Electricimp code
- Mailgun routing setup
- SGpro Setup
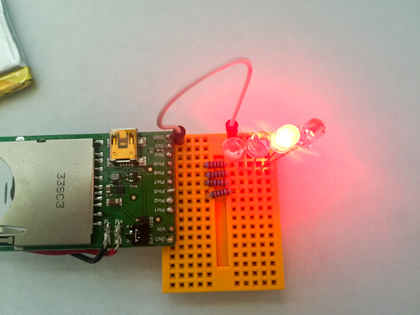
1. Hardware Setup
You need an electric imp device. I also connected a LiPo battery since I wanted it to be portable. However, that is not a necessary step as you can power your imp through USB. You can also put the device in a case to make it more visually appealing.
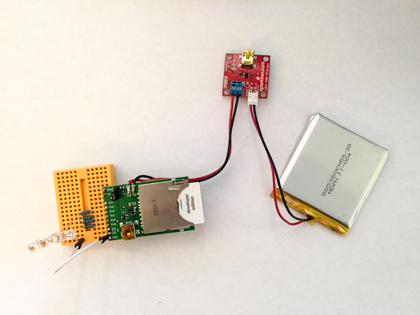
Hardware list
- Electricimp
- Electricimp breakout
- Red,Blue,Yellow,Green Led
- Mini Breadboard
- Jumper wire
- Optional: Polymer Lithium Battery
- Optional: LiPo USB charger
- Resistors (I used 200KΩ)
There is plenty room to adjust components in the list. I just used my spare parts.
The first step is to assemble and power your electricimp. Read this.
Then connect your leds to the pins via a resistor as follows. Read this first.
- Blue led goes to pin 7
- Red led goes to pin 8
- Yellow led goes to pin 9
- Green led goes to pin 5
All the cathodes are connected to ground.
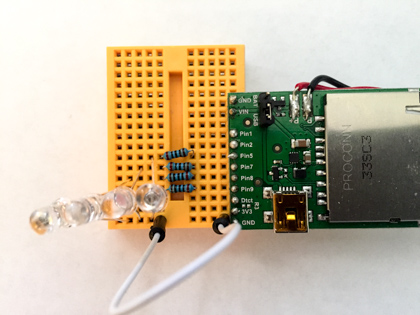
This step might take awhile, be patient.
2. Electricimp code
The imp uses an online IDE. Read this to understand how to setup and program the imp.
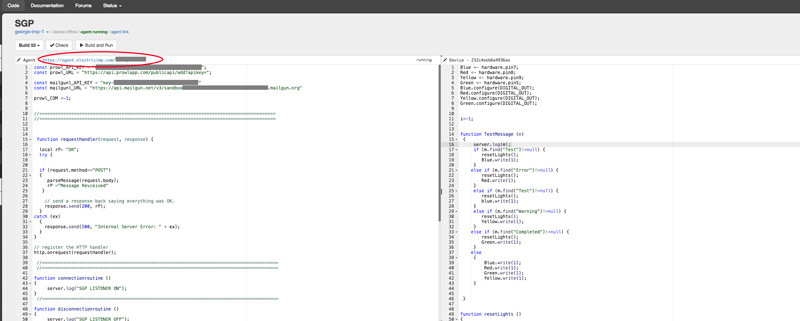
My code is available here. Finally make a note of the agent’s address (the one circled) It should look like this:

3. Mailgun routing setup
Before this step you need to have a mailgun account setup. See my post and follow instructions.
Now lets set up the routing options. Read more about routes here. In mailgun, select the following routes:
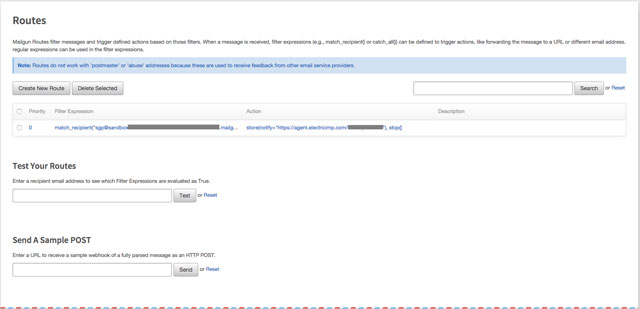
Create a new route
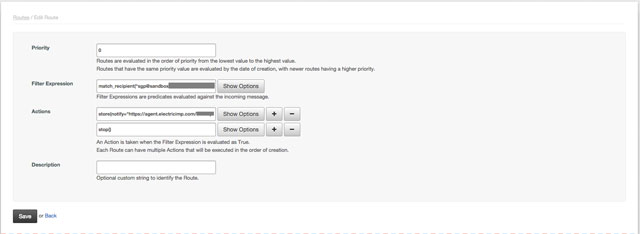
The rules are pretty simple.
- Filter Expression = sgp@xxxxx.mailgun.org
- Actions : Store(Notify:https://agent.electricimp.com/xxxxxxx
4. SGPro Setup
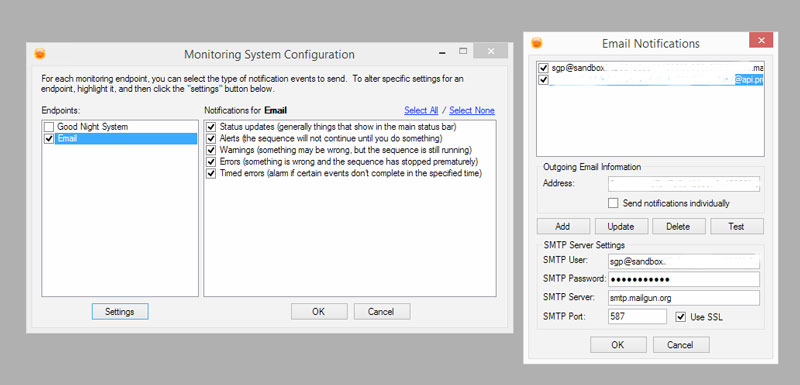
In SGPro add a new Address, which is the sgp@xxxx.mail.org. Press Test and you should see :
Enjoy!!!! 😉
