Equipment
Stellar Skies trip report – February 22, 2019
After 10 month absence, a visit to Stellar Skies was long overdue.
My flight there was an omen of things to come. Austin was covered with heavy clouds. Also a first for me, and a first for our pilot, who was on the job for forty years, we had to abort landing twice. There were two military planes landing ahead of us. It turns out military planes can decelerate faster than a commercial plane. We got too close for comfort so we had to abort… twice. Not a good feeling, I do not recommend it.

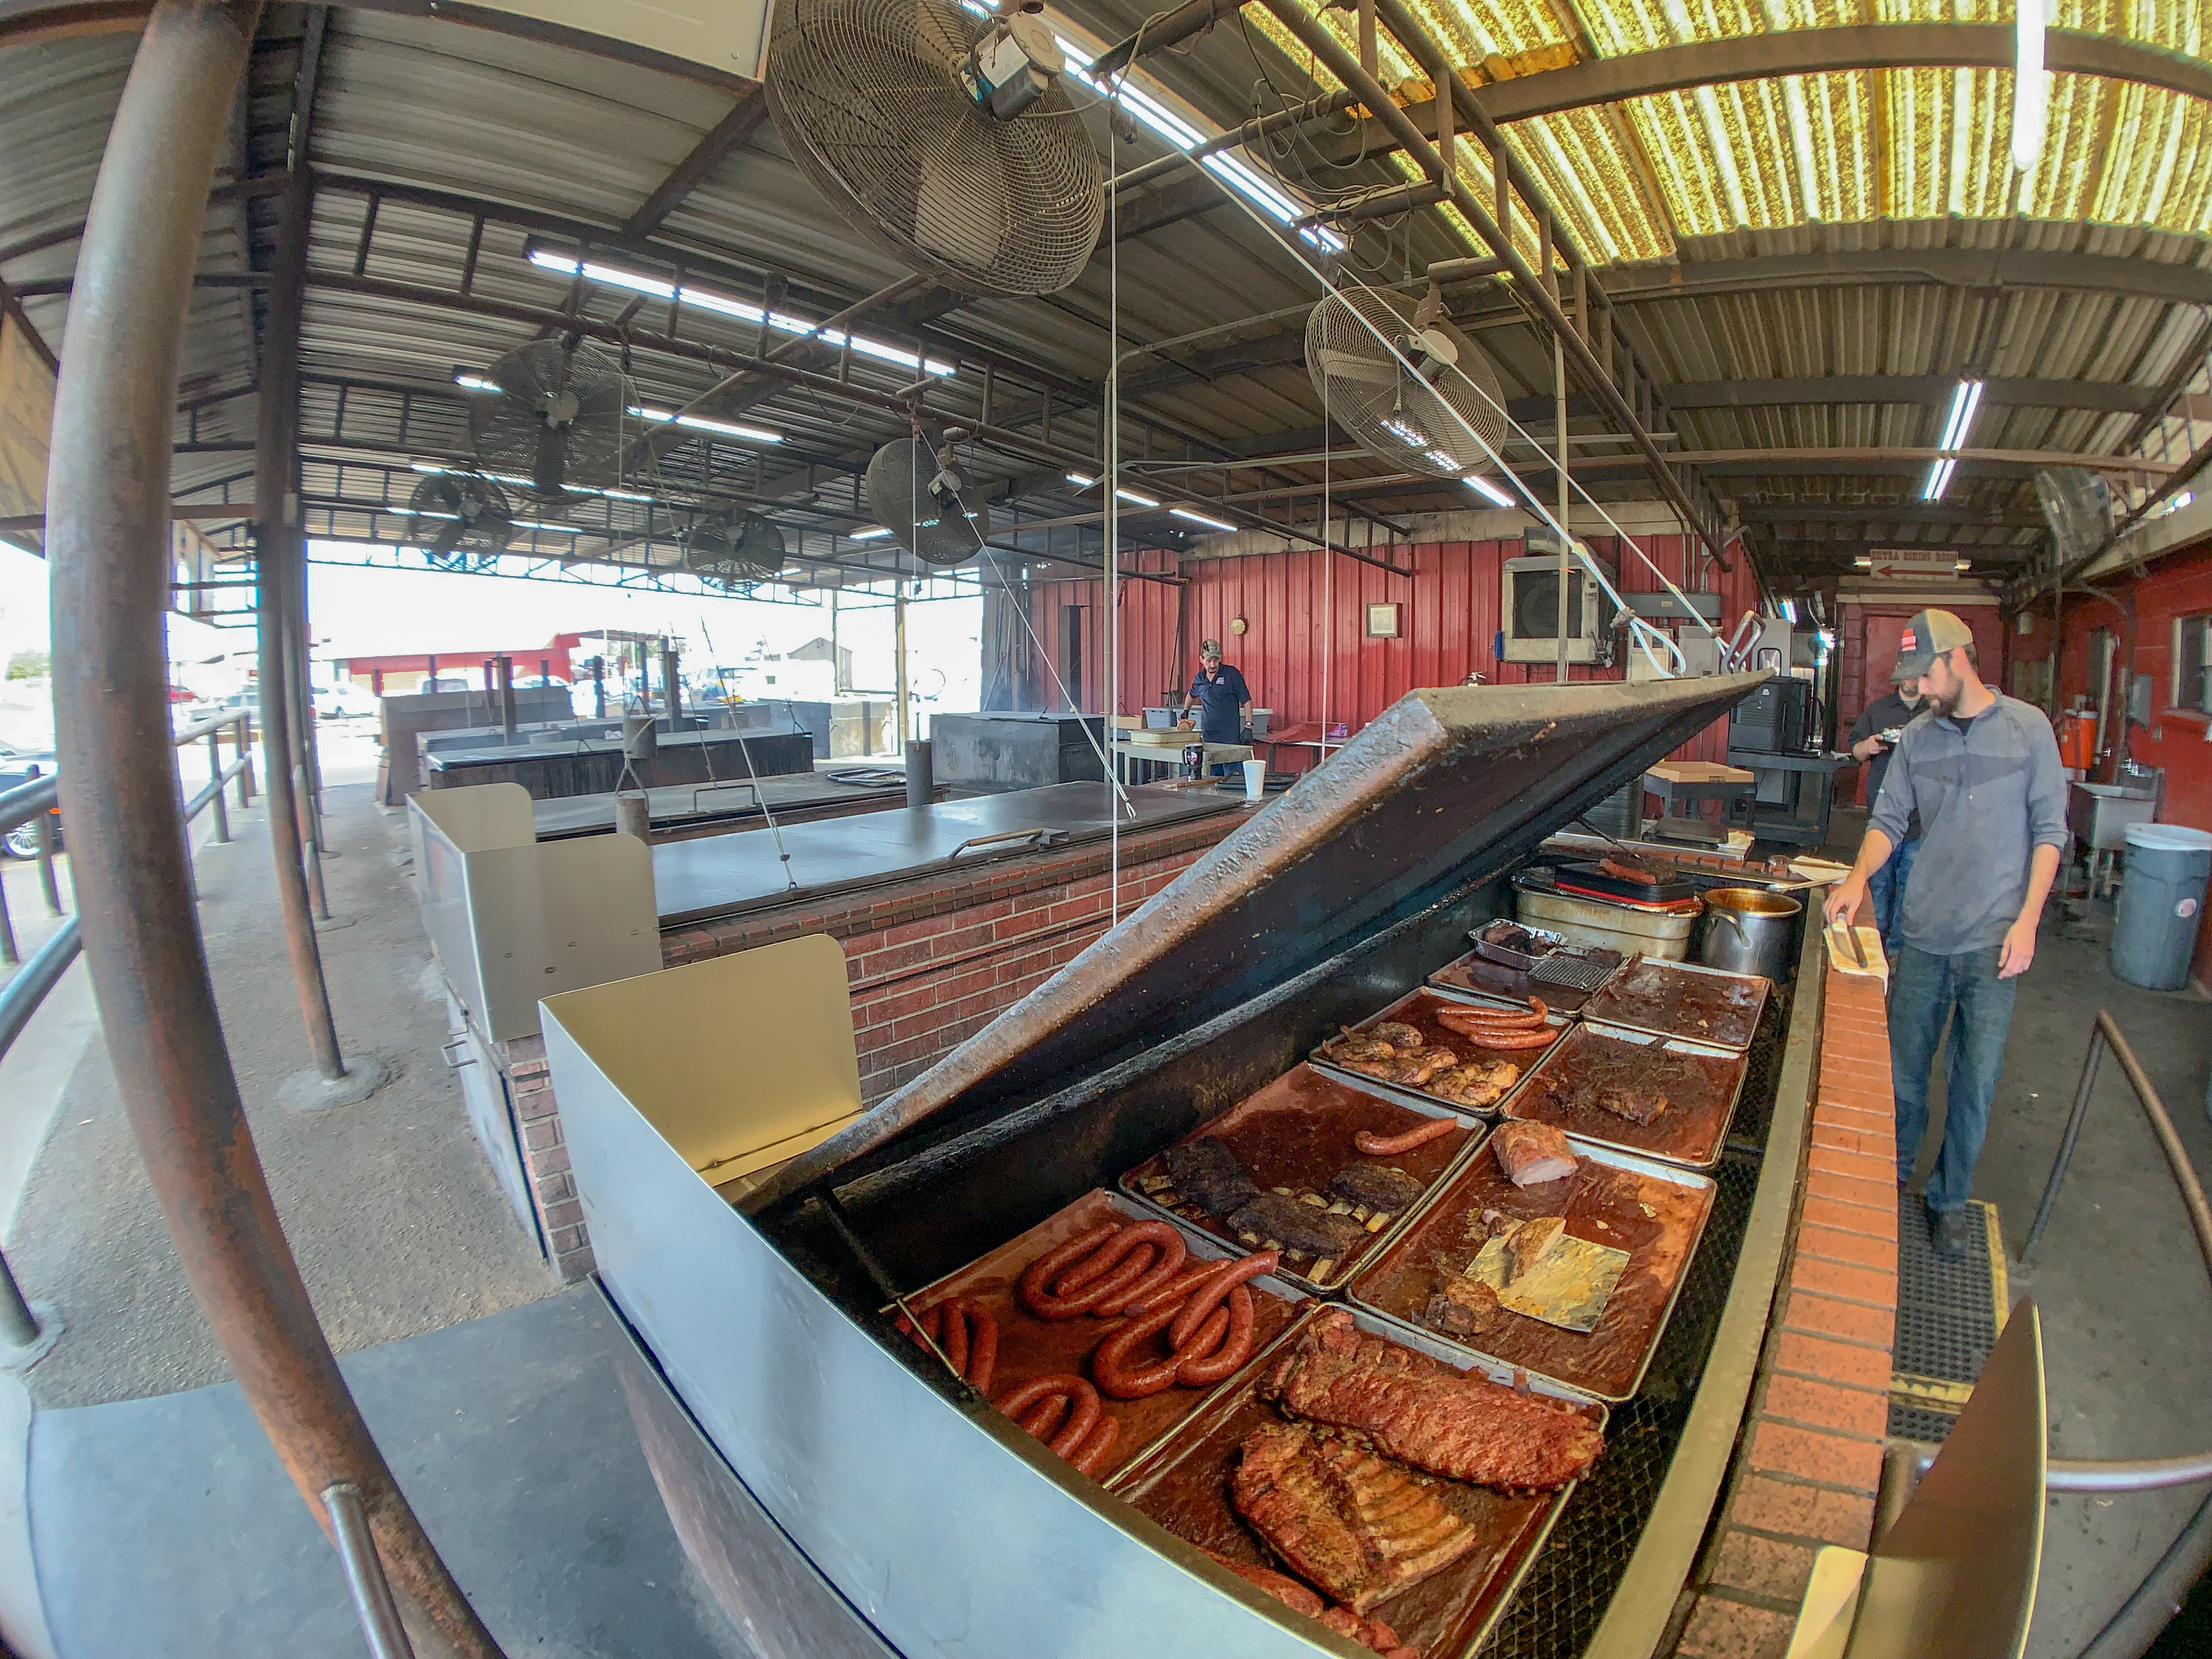
I met my son in Austin and then we drove to Llano for some Cooper’s. (one of those days I will try Miller’s)
We also visited the Red Top Jail

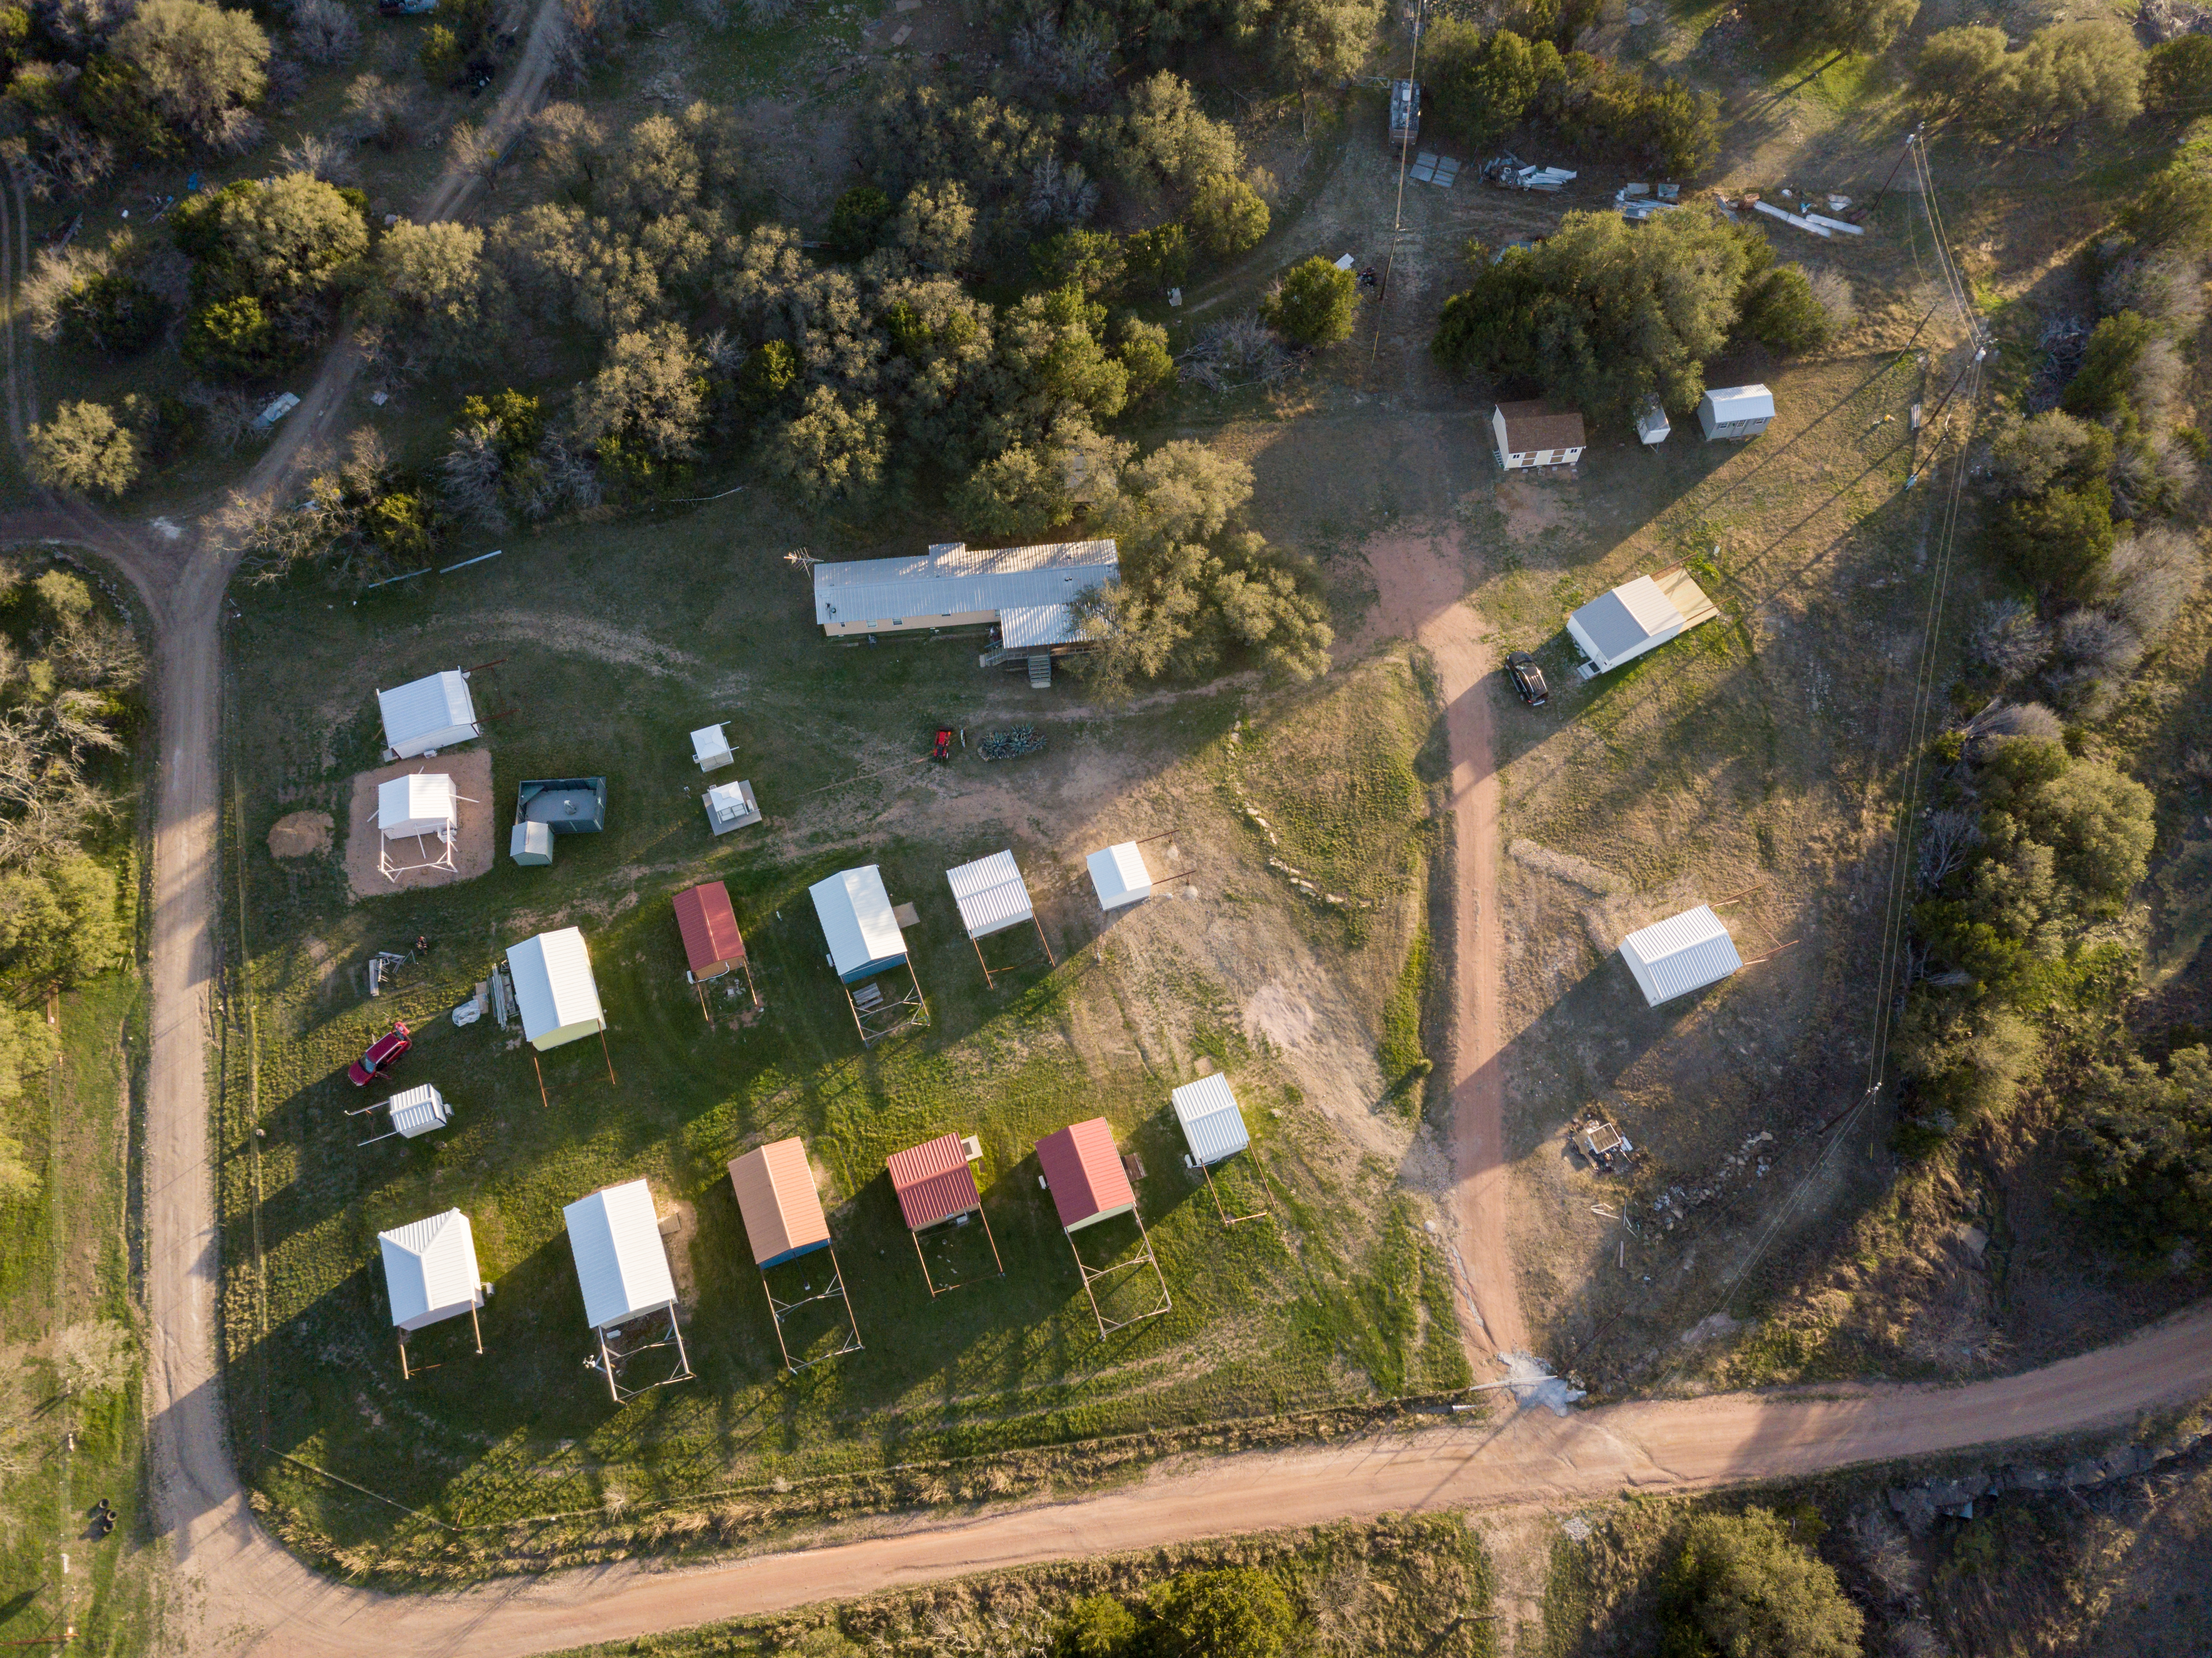
We arrived at a very windy Stellar Skies so I was only able to do a quick drone fly-by. You can see the changes since my last visit below.

The observatory work was very frustrating. My main objective as to repair the roof and the rotator. Both of them not responding remotely.
It took a few hours to figure out that the roof motor was plugged in to my dead UPS. In the meantime I re-installed drivers, fixed my scopes parking position, re-wired the cat-eye, never once thinking that the reason might me simpler…
The rotator failure was due to a worn out cable on the power supply. To fix that I had to remove the heavier than I remembered scope. I was in the process of removing the versa plate, so I can thread the new power supply through the mount, when the versa plate screws broke off.

And with that, the trip was over. Although Terry (actually Terry’s wife) was kind end enough to get us a screw extractor I had no replacement screws. For all you Paramount owners versa plate screws are expensive 😦

So the original plan was abandoned. Terry performed an amazing field repair by splicing the old and the new cables of the power supply. At least the observatory is up and running for now.

On a bright note. Jarret appeared as he always does. So we spend the rest of the night on his observatory looking at the sky.


Until we meet again….
DYI: Notifications from SGPro to an electricimp device
This is a quick way to send notifications from SGPpro to a device. Depending on the type of message the SGpro sends to the device, the device will light up a certain color LED. I am using an electricimp, if you are nor familiar with this particular device start here. SGP sends emails with the following titles:
- SGPro Error
- SGPro Warning
- Test Message from SGPro
- SGPpro….Completed
The messages will be from SGPro through a mailgun account and routed to the electricimp. The imp will parse the message subject and accordingly will display:
- Green – All good
- Red – Error
- Yellow – Warning
- Blue – Test
- All – Unknown message
First you need to setup a free mailgun account. Follow the steps in this post. After completing this step you need to set up a route. Effectively, mailgun receives your message then sends an HTTP Post with details to your imp. There are four parts:
- Hardware Setup
- Electricimp code
- Mailgun routing setup
- SGpro Setup
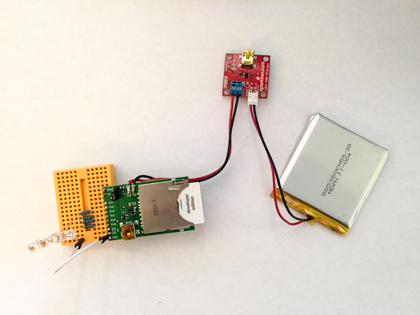
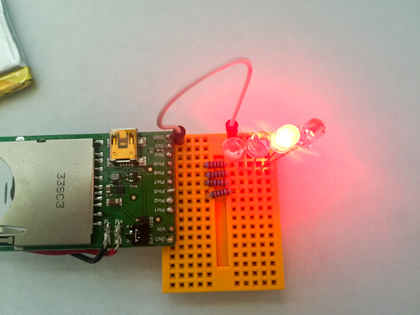
1. Hardware Setup
You need an electric imp device. I also connected a LiPo battery since I wanted it to be portable. However, that is not a necessary step as you can power your imp through USB. You can also put the device in a case to make it more visually appealing.
Hardware list
- Electricimp
- Electricimp breakout
- Red,Blue,Yellow,Green Led
- Mini Breadboard
- Jumper wire
- Optional: Polymer Lithium Battery
- Optional: LiPo USB charger
- Resistors (I used 200KΩ)
There is plenty room to adjust components in the list. I just used my spare parts.
The first step is to assemble and power your electricimp. Read this.
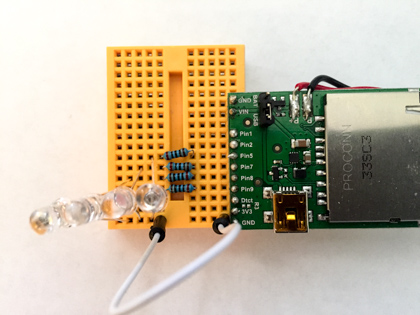
Then connect your leds to the pins via a resistor as follows. Read this first.
- Blue led goes to pin 7
- Red led goes to pin 8
- Yellow led goes to pin 9
- Green led goes to pin 5
All the cathodes are connected to ground.
This step might take awhile, be patient.
2. Electricimp code
The imp uses an online IDE. Read this to understand how to setup and program the imp.
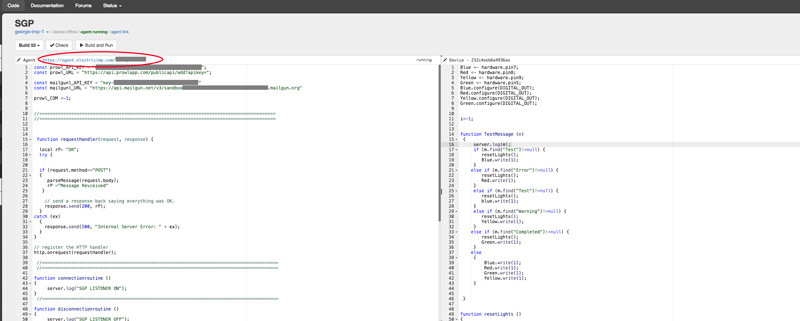
My code is available here. Finally make a note of the agent’s address (the one circled) It should look like this:

3. Mailgun routing setup
Before this step you need to have a mailgun account setup. See my post and follow instructions.
Now lets set up the routing options. Read more about routes here. In mailgun, select the following routes:
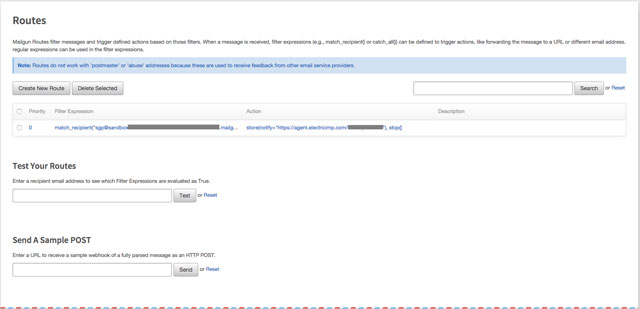
Create a new route
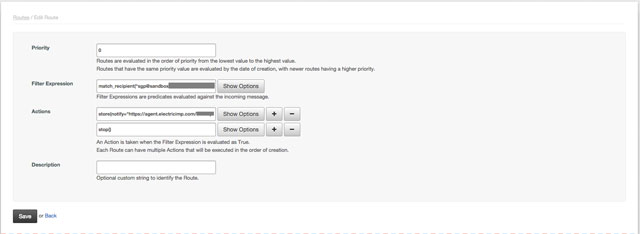
The rules are pretty simple.
- Filter Expression = sgp@xxxxx.mailgun.org
- Actions : Store(Notify:https://agent.electricimp.com/xxxxxxx
4. SGPro Setup
In SGPro add a new Address, which is the sgp@xxxx.mail.org. Press Test and you should see :
Enjoy!!!! 😉
DYI: Notifications from SGPro to your iphone
SGPro added notifications through email. This is a quick way to get notifications in Prowl (and Growl) on your iphone.

First you need to purchase Prowl form the iTunes store here. Or through your iPhone’s store
You also have to have a mail account. I created a mailgun account so I do not clutter my main mailbox.
To create a mailgun account, and get the settings go to www.mailgun.com. Sign up for a free account. Then form the mail panel:
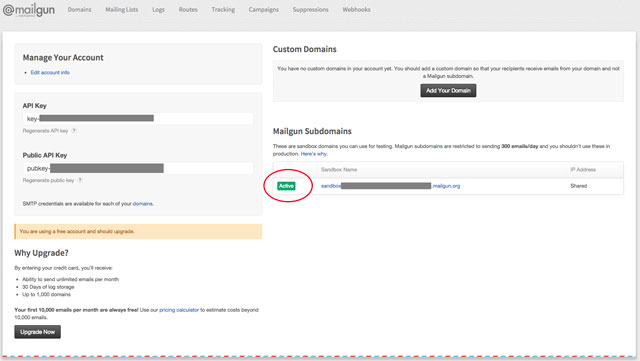
You will be given API Keys and the default postmaster@XXX.mailgun.org account. You will need to create a new account.
click on activate:
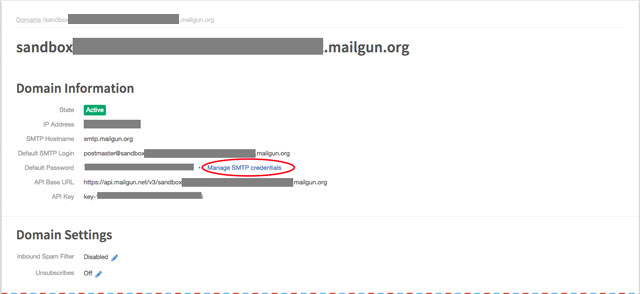
click Manage SMTP credentials
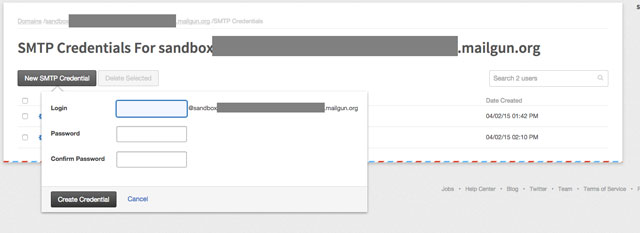
and create a new account. I used sgp@xxxxx.mailgun.org and password. You will need this to configure the SGP mail settings
You next have to create a Prowl email account. So go to prowlapp.com
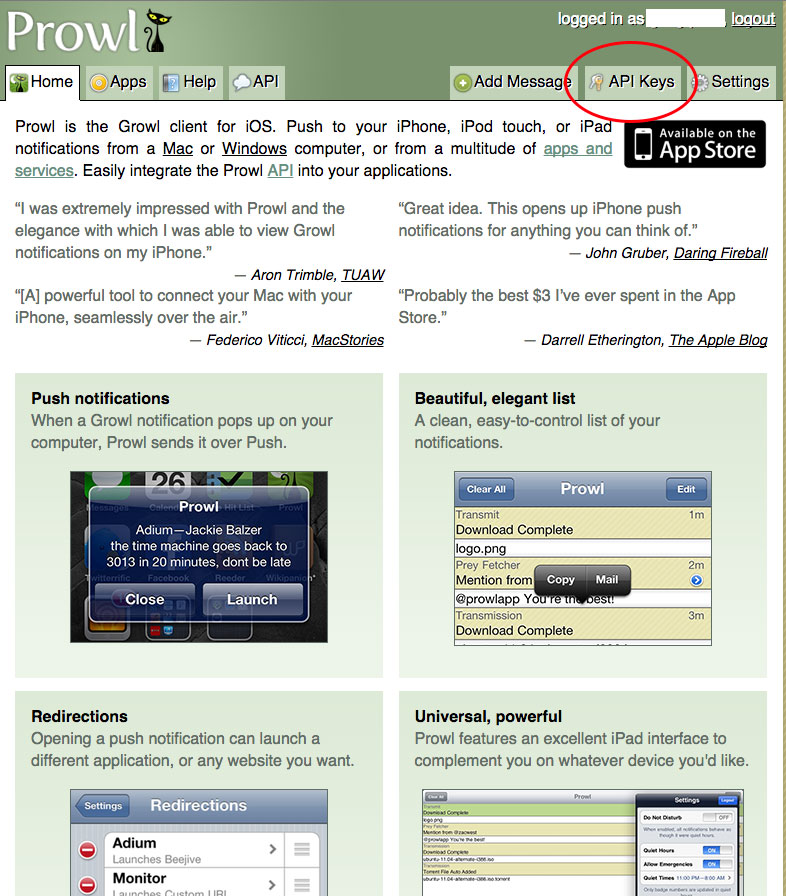
Select API Keys and generate a new key. Name it SGPPro:
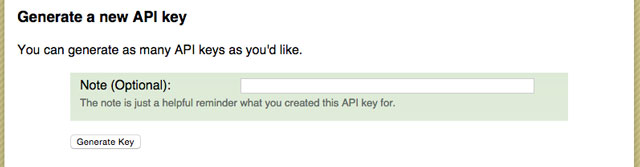
And generate:
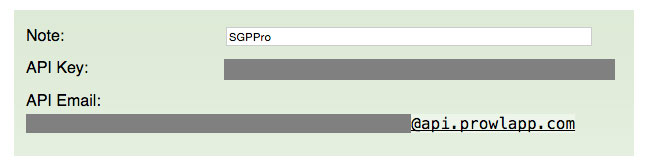
Now you have an API Email for your app (xxxxx@api.prowlapp.com). Now lets tailor it together.
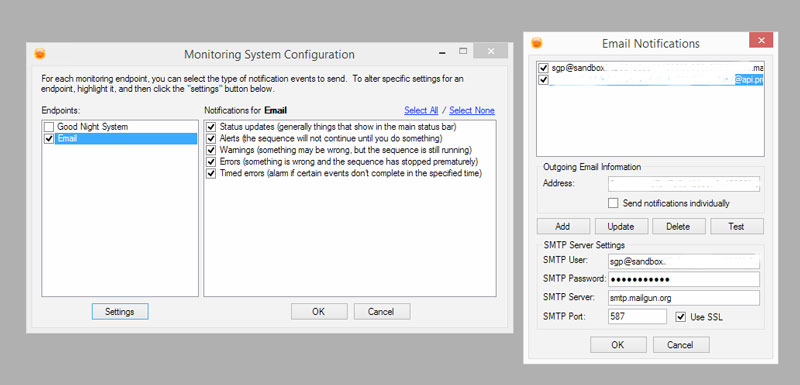
Start SGPro and Select Tools/Configure Notifications/Settings
For address enter the prowl email you created above

and for you settings add the settings from your mailgun server.
Use smpt.mailgun.org for SMTP Server
Username and password are the ones you created (sgp@xxxxx.mailgun.org)
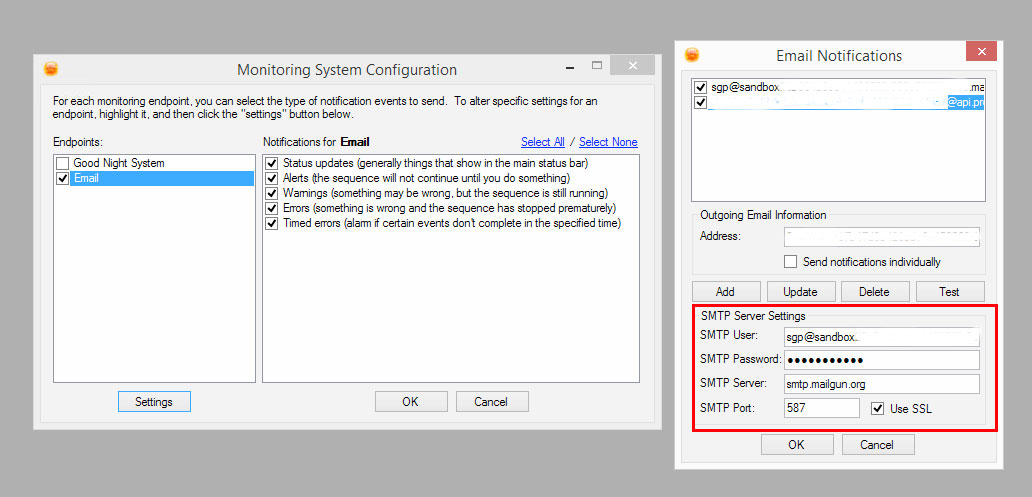
Press test and watch for the notification in your iPhone. Enjoy!!!! 😉
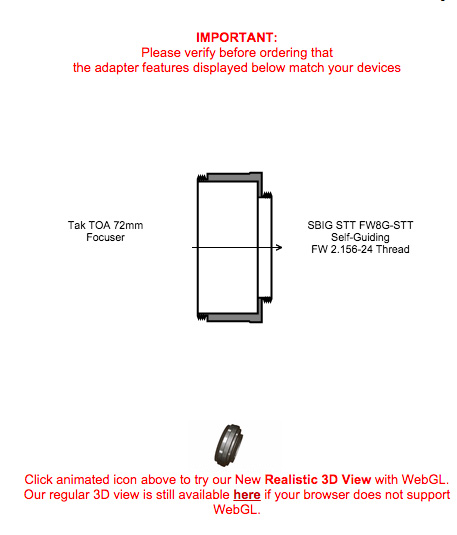
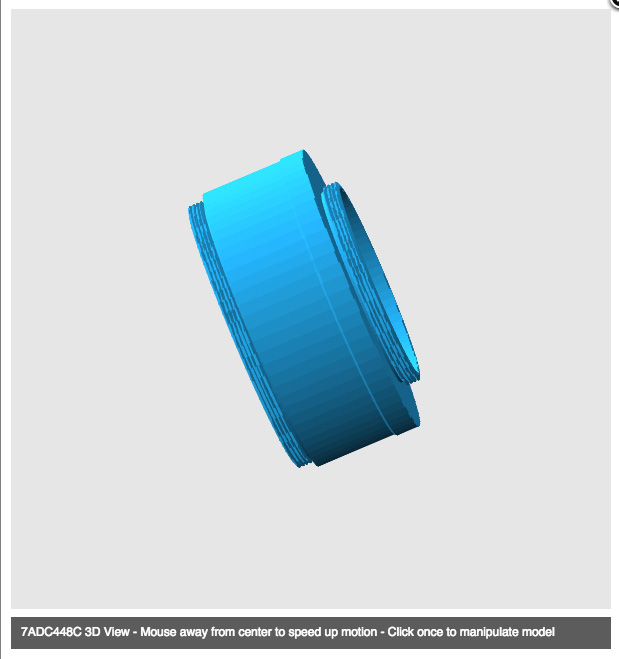
Finding the right spacer between a TOA-Focal reducer and an SBIG-STT 8300M with FW8G-STT
The distance between the reducer and the camera plane is critical. My telescope is a Takahashi TOA-130. I will be matching it with the TOA reducer and SBIG-STT 8300M camera with an FW8G-STT filter wheel.
My Imaging train

TOA-130 with The TOA-RF reducer backfocus

The first key number is calculating the backfocus distance. (more here)

The number I am looking for is 83.7mm, which is the optimal distance from the reducer to the CCD.
SBIG STT8300M and FW8G-STT Spec backfocus
For details go here

I am using 3mm filters so the back focus distance according to the chart is 52.5mm. SBIG technical support advised me to add 3.7mm for the mounting plate, The camera backfocus distance 56.2mm. A spacer is required between the focal reducer and the CCD.
Spacer length = 83.7- 56.2 = 27.5mm spacer.
To build one go here.